

If you have a background in native mobile development and for some reason had to switch to Xamarin, you are probably familiar with that “oh yeah, it doesn’t work this way here” feeling. Having to find new solutions for problems you haven’t even considered to be problems before is what I would call business as usual in Xamarin. Call me a weirdo, but that is also what made me enjoy learning the technology so much.
The project I had to dive into cross-platform development with, was a big adventure on its own – a very ambitious idea, a rather vague picture of the expected result (and therefore constantly changing requirements), a critical lack of time and the total of 3 developers, all rather new to the technology. Time pressure, general cluelessness about Xamarin and no expert looking over our shoulder turned into hours of online research, in a desperate hope that someone has already encountered the exact same issue. I know that, as any other developer, you have been there yourself, and I don’t have to tell you about that inexplicable relief of finding what you were looking for. Just as much as I don’t have to elaborate on the frustration of trying to fix the problem that you’ve created, trying to fix the problem that you’ve created, trying to fix the problem…

One of the issues, which has nearly caused such infinite loop of research, was connected to building up a pretty common navigation concept. Here is what we were trying to achieve:
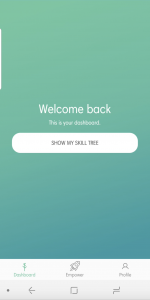
After logging in, a user should see their dashboard. From there they can navigate by switching between individual tabs. Those are always present on the bottom of the screen, “framing” any active content. Each tab has it’s own navigation tree, meaning one can go back and forth between pages inside any tab. If a user decides to switch between tabs, the app remembers current position in all the trees. This way one can always pick up from where they left the tab, no matter what has happened in the meantime.
This navigation concept has been around for a while, and you could probably name a couple of apps using it off the top of your head. However, just like I have mentioned earlier, things in Xamarin are not necessarily what, where and how you are used to. It’s not rocket science, but if you are new to the platform, this little tab page navigation tutorial could hopefully save you some headache. Let’s dive right into it.
Xamarin Navigation Basics
1. Defining MainPage
The root page of your application is defined in App.xaml.cs, which is a part of the shared code. Here you can tell your app, which page to display on start.
public App()
{
    InitializeComponent();
    MainPage = new MyMainPage();
}
2. Hierarchical navigation
Hierarchical navigation is the most basic way to move between pages in Xamarin. You can think of it as a stack of cards in solitaire. The first card in the stack is your root page. You can put new pages (or cards) on top of it in any order you like, as long as you comply with a couple of predefined rules. In a solitaire, these rules would tell you, say, to only put lower ranked cards on top of higher ranked ones. In a Xamarin app, the rules define legitimate navigation paths. They are nested in the code and influence the way a user can interact with your app.
So how does it look from a less abstract, more code-oriented perspective? Your navigation tree is represented by a NavigationPage. You can pass the root page of the tree as a constructor argument, like this:
var myNavigationPage = new NavigationPage(new MyPage());
Now that you have your base card on the table, you can add some more on top of it, by performing a push operation. In this example, you push a new page on the navigation stack after a button is clicked:
private async void Handle_MyButtonClicked(object sender, EventArgs e)
{
    await Navigation.PushAsync(new MyOtherPage());
}
If you want the top page of the stack to disappear and show the page below, do so by calling the pop method of Navigation property:
private async void Handle_DismissButtonClicked(object sender, EventArgs e)
{
    await Navigation.PopAsync();
}
Now that you can manipulate your stack, it’s time to check out, how tabbed pages work in Xamarin.
Tabbed page navigation
Step 1. Creating a Tabbed Page
public partial class MyTabbedPage : TabbedPage
{
    public MyTabbedPage()
    {
        // Your constructor code here
    }
}
All we do here is inherit from a TabbedPage class, which is provided by Xamarin. It is important to remember, that tabs will not render the exact same way on different platforms. On iOS, they will show up at the bottom of the screen, beneath the actual page content. Android, on the contrary, displays tabs on the top of the page. There are many more differences in tab behavior across the two platforms, the most important ones covered here.
Note: For our scenario, we had to go for a unified look (icon tabs on the bottom) for both, iOS and Android. If this is what you are going for as well, check out BottomTabbedPage control by Naxam.
Step 2. Making TabbedPage to your root
All you are doing here is telling your App to display the tabbed page you’ve created in the previous step on start. Use MainPage property to do so.
public App()
{
    InitializeComponent();
    MainPage = new MyTabbedPage();
}
Step 3. Filling the tabs
How many tabs is your app going to have and what are they going to be? When you’ve decided on the navigation concept and created all the necessary pages, all you need to do is pass them to the tabbed page.
Let’s go back to our solitaire metaphor for this one. Imagine, that your game has a row of three cards in the beginning. Maybe, two of those are the basis for stacks a player needs to build, and the third one is just a single card, pointing at a trump. How do you create an analogy of this constellation within a tabbed page?
The game field you lay out your cards on is your tabbed page. It should display three cards in one row so you will need the total of three tabs. One of them is very simple since it only has one card in it. Nothing goes on top of that card, and the player does not have the power to alter it. For our app, it means that no navigation takes place inside the tab. This behavior is going to be represented by a ContentPage.
The other two cards have a more complex role. They will become stack bases. Cards are going to be put on top of them, and, maybe, taken back off. For our pages, this means that they are going to become roots of their own navigation trees, which users will interact with. By pressing buttons or swiping, they will travel from one page to another, pushing them on or popping them off the stack. To enable this, we will need a NavigationPage class to wrap around our root page. It will allow us to use the push and pop methods and let our users travel up and down the stack.
An important notice here: you should not wrap TabbedPage itself into a NavigationPage. iOS does not support this, and you are going to run into troubles trying to do so. Your concept should base on populating a TabbedPage with ContentPages and NavigationPages only.
Finally, you can add content and navigation pages to the TabbedPage using its Children property:
public Tabbs()
{
    // Your constructor code here
    Children.Add(new NavigationPage(new MyPage());
    Children.Add(new NavigationPage(new MyOtherPage());
    Children.Add(new MyContentPage());
}
Step 4. Manipulating the stacks
NavigationPages give you a couple of methods to work with the stack. We are only going to look closely at the two most basic ones today: PushAsync() and PopAsync(). These methods can be called on the Navigation property of a Page and allow you to put a new card on top of your stack or remove the top card.
Any class, which derives from Page provides you with a Navigation property. Sometimes, however, it might be useful to manipulate the navigation tree from outside the pages themselves. In order to expose the tree to other classes in the app, you might consider declaring a public variable in your App class:
public static INavigation Nav { get; set; }
public App()
{
    InitializeComponent();
    //...
    var myNavigationPage = new NavigationPage(new MyPage());
    Nav = myNavigationPage.Navigation;
}
After you took care of this, you can access the navigation tree from anywhere inside of your app:
private async void Handle_SomeNavigationButtonClicked(object sender, EventArgs e)
{
    await App.Nav.PushAsync(new MyOtherPage());
}
While this step can be useful regardless of the navigation concept of your application, it was absolutely crucial for our multiple-navigation-stacks solution, because we needed to know which branch of our navigation tree we are on at all times.
Step 5. Knowing where you are
How do you let the App know which tab is currently active so that the pages get pushed to the right stack? One way to achieve this would be to let TabbedPage take care of changes by overriding its OnCurrentPageChanged() method:
public partial class MyTabbedPage : TabbedPage
{
    public MyTabbedPage()
    {
        // Your constructor here
    }

    protected override void OnCurrentPageChanged()
    {
        base.OnCurrentPageChanged();
        App.Nav = CurrentPage.Navigation;
    }
}
Now, whenever you are calling the Navigation property using App class, the active stack is going to be chosen.
Extras
The basic idea of navigation is simple. You have an overall context, your App class, which has the information about your current location and provides a mechanism to interact with it. You can use this mechanism from anywhere inside the application to go forward and backward in the navigation stack. Classes requesting such manipulations do not have any knowledge about the selected tab or current position in its navigation stack. All they need to do is ask the App to perform a specific operation on the right stack.
Depending on your project, you might need some extra functionalities in connection to your TabbedPage. Here are two optional steps we had to use in our app:
Step 6.(Optional) Reset all stacks
Using the concept of separate navigation trees inside a TabbedPage, you might also want to be able to reset all of them at once. For instance, if a user logs out, you would not want the app to keep all the navigation stacks for the next logged in user to see. What you would need here is to call PopToRootAsync() method on the Navigation property of each one of your TabbedPage children.
Step 7. (Optional) Set selected tab
Sometimes it can also be useful to define selected tab programmatically. In our case, a user should always land on a specific tab after login. To achieve this you can set the CurrentPage property of your TabbedPage.
I guess that would be it for our short dive into the unwonted peculiarities of cross-platform development. I hope this post was useful for some of you Xamarin warriors out there. Just like any of us here at Billige Plätze, I would be very happy to hear from you in the comment section below. Any feedback is appreciated.
Let’s learn from each other.
Dannynator.